I miss posting/sharing in here! Business has been busy (grateful) and the end of school year activities are ramping up big time. Oh, and I have some really big news to share about the upcoming NAPO SF Bay Area conference. As if I don’t have enough on my plate, I’m on the planning committee for our regional conference. We’ve secured the most amazing keynote speaker and I’m on a sub-committee to secure vendors for our expo hall and sponsors (companies, if you’re reading this – e-mail me!).
Our conference is open to non NAPO members…hint hint.
I’ll share more about this later. Point is, I have loads of images and projects to share with you. The struggle has been finding the time to get in here to write. When the kids are in bed around 8, the last thing I have the energy for these days is writing. My heart is there, but my body / mind says take a chill, Sam. 😉
Anyway, I’m here and not going anywhere! #luckyyou But sorry it’s been so quiet around here.
Today though – I’m here in full swing and over the top excited to share the end result of my very own DIY garage mudroom. I’ve been dreaming of this coming together for so long. Of course, this is my ultimate dream mudroom and I’m not letting go of this as a possibility down the road (when there’s a whole bunch more money to custom build it out)…
Before I start in about how I assembled this “temporary” solution, I wanted to mention why I’m doing this. The wall where a custom built-out garage mudroom will be located is the wall where the garage fridge is currently sitting. And the shelving next to the fridge – and throughout the garage – is going to be updated. Soon. My plan is to install Elfa shelving and Elfa utility racks throughout the garage. Once that project is complete and I know everything that must live in the garage has somewhere to sit, I can start designing a custom garage mudroom. I want to maximize every possible inch of a mudroom…and if you didn’t already know, I’m sorta an over thinker. Ha!
Also, Elfa can be re-used over and over again. So while I made a few hundred dollar investment, it will be re-used in this garage.
And the bottom line is, this little DIY garage mudroom is exactly what we needed for now. The garage was getting out of control so that trend pushed me to get this done now. We are home where we don’t wear shoes in the house. My kids love to play outside and they are hard on their shoes. So I prefer they don’t come inside. It saves me the hassle of having to sweep or vacuum each night. And as I mentioned in this post about our sock organization, shoes don’t go missing when they are removed right here in this spot. When we we leave, we know where shoes are. And I love that!
I started this wall project with a fresh coat of paint, which you can read all about right here…

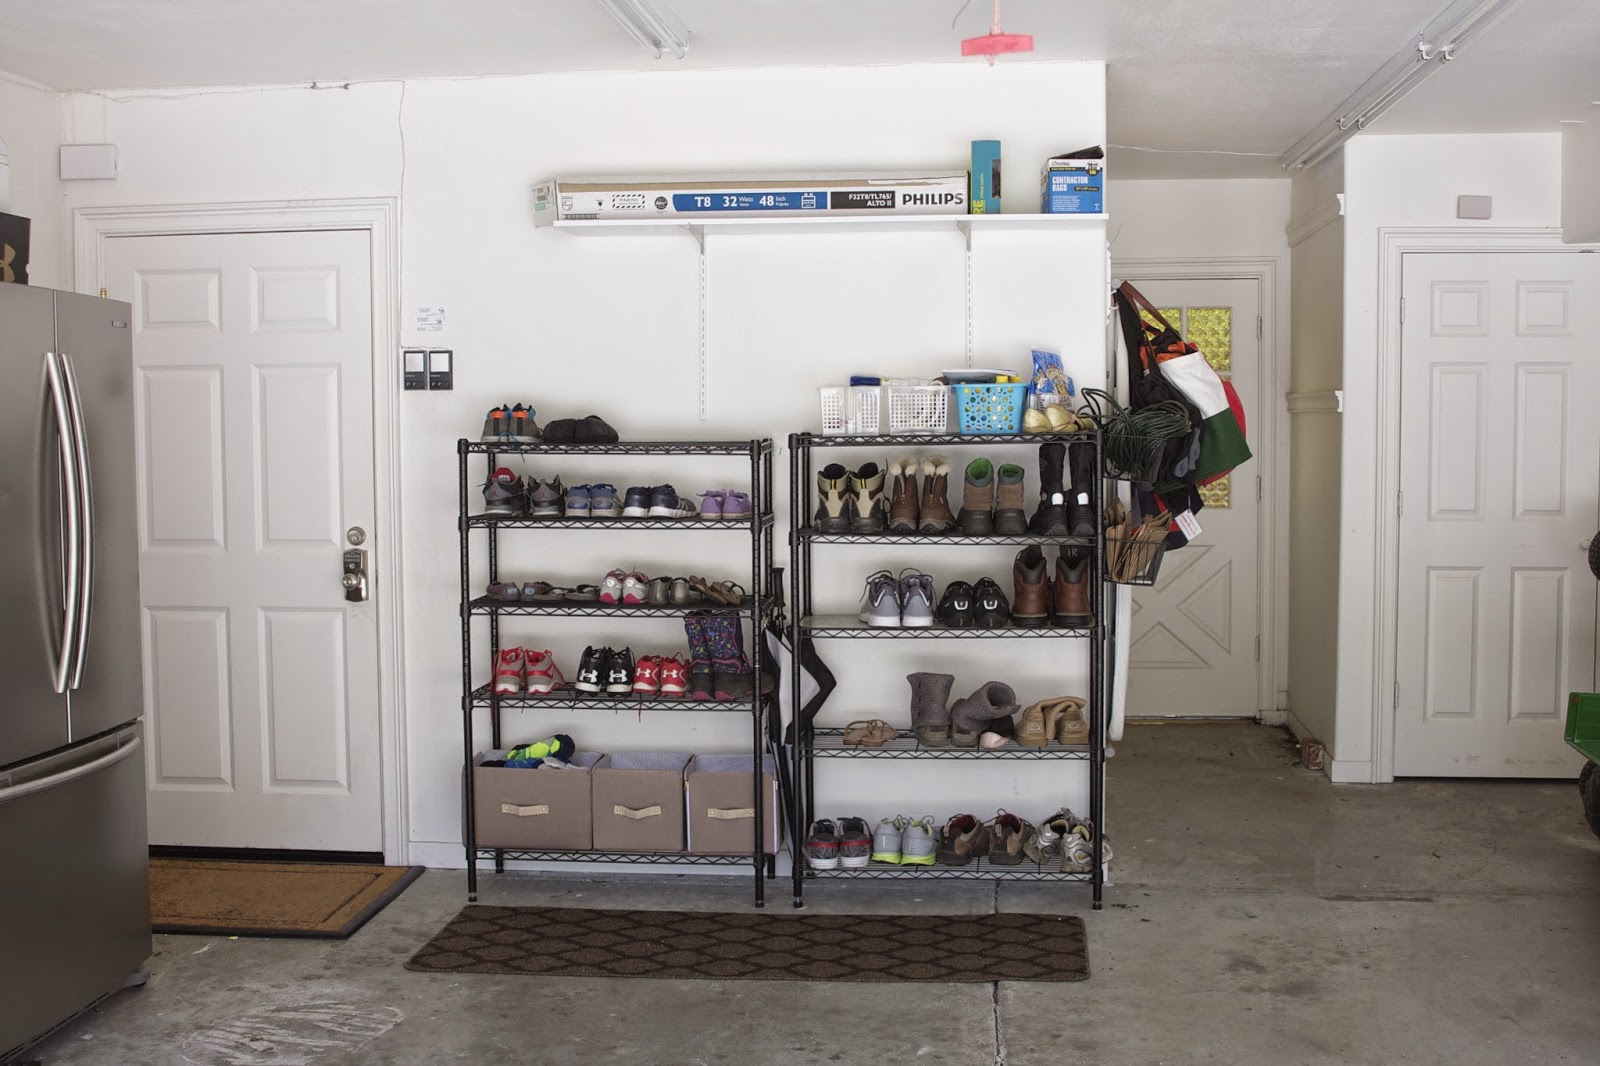
With my blank slate, I got to planning. My previous set-up was free-standing shelves…

Before you head to The Container Store, or any other place to purchase a solution, make sure you know what you’re storing on your system. I knew exactly what would be set up in my mudroom, so I planned on enough shelving to more than cover that…along with a few added features to get some things out of the house. I also planned for 12″ depth shelves due to the door on the left. I didn’t want the kids or anyone else bumping into something protruding too far near this walk-through…
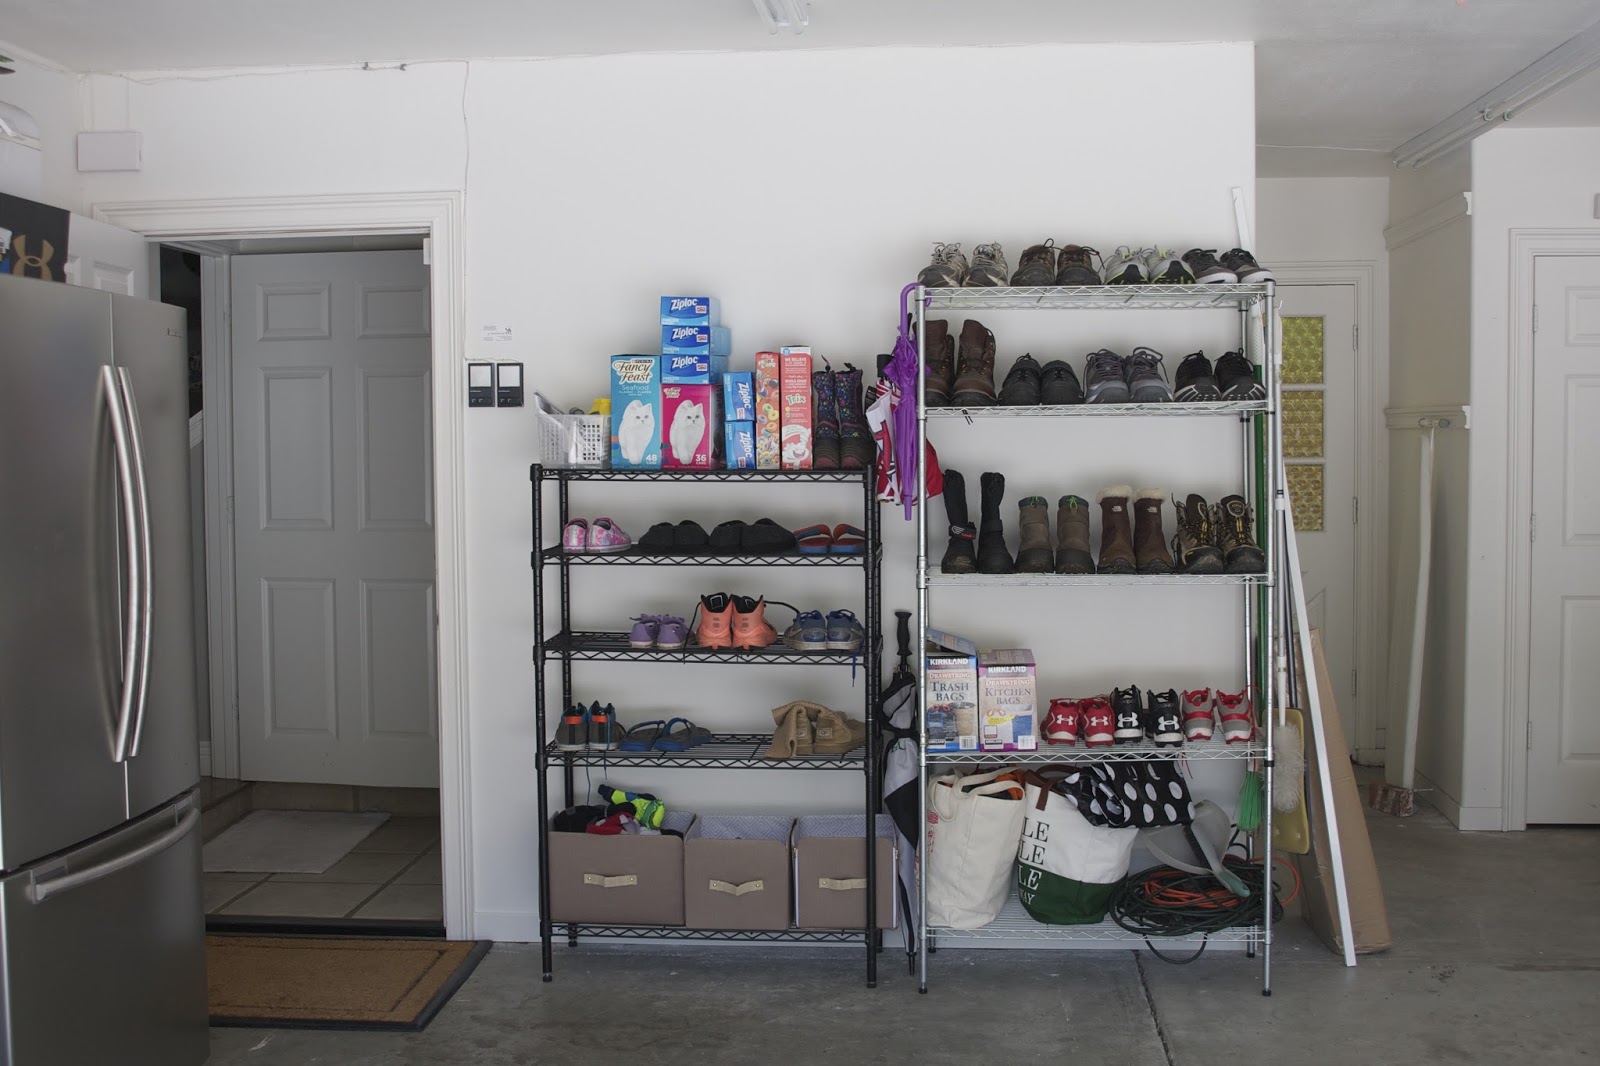
Shelving gone…

Let’s get cracking on this mudroom! For this wall, I went with a mix of Elfa shelving from The Container Store, along with their utility tracks, and I grabbed a Martha Stewart bench / cubby sold at The Home Depot.
If you’ve never installed Elfa before, it is SO simple! You start by holding up your top track at the top of the wall (or wherever you plan to have the system begin hanging) and mark the holes with a pencil. The holes are 8″ apart. After marking your holes, set the top track aside and pre-drill your pencil marks. Depending on if you hit studs or drywall will depend on how thick your drill bit is. I hit drywall with each pre-drilled hole. So in this case I used a 3/8″ drill bit…

Yes, it’s big but necessary for your drywall anchors…
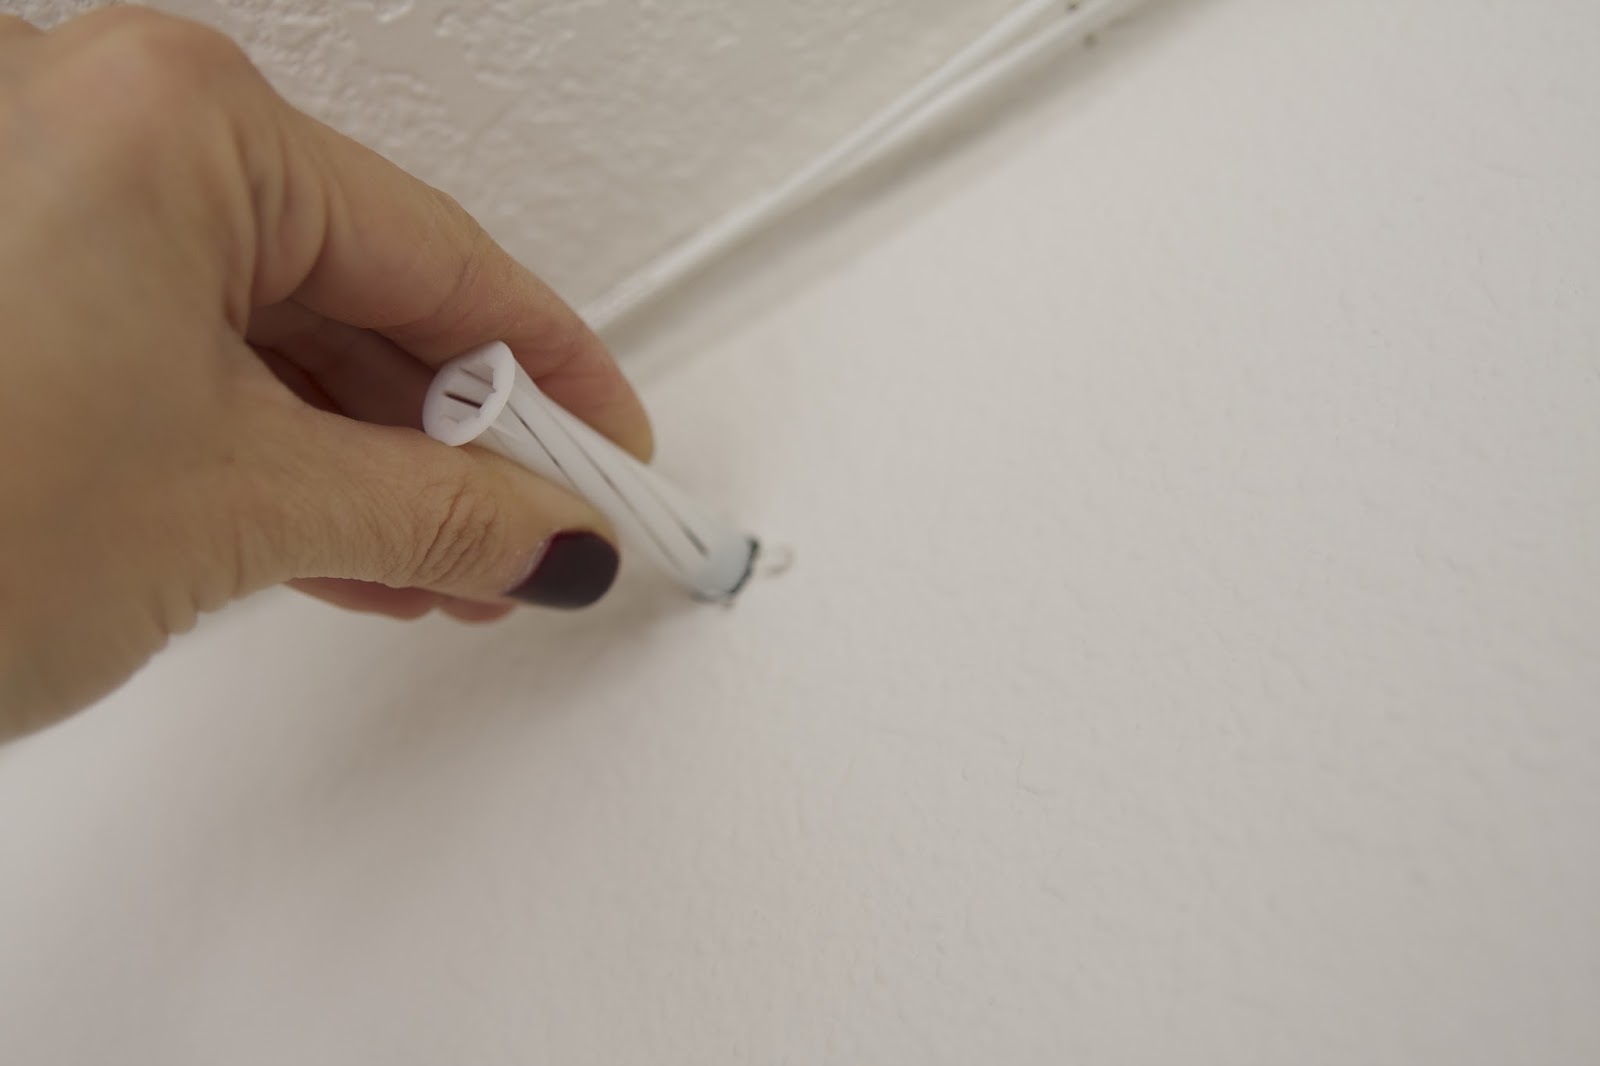
After you’ve pre-drilled your holes, you simply tap those drywall anchors into place. Then you line up the track once again (with the holes you’ve already drilled / anchored) and drill in the screws. For this you’ll need a standard philips head drill bit…

Just drill away until you’ve filled each hole…
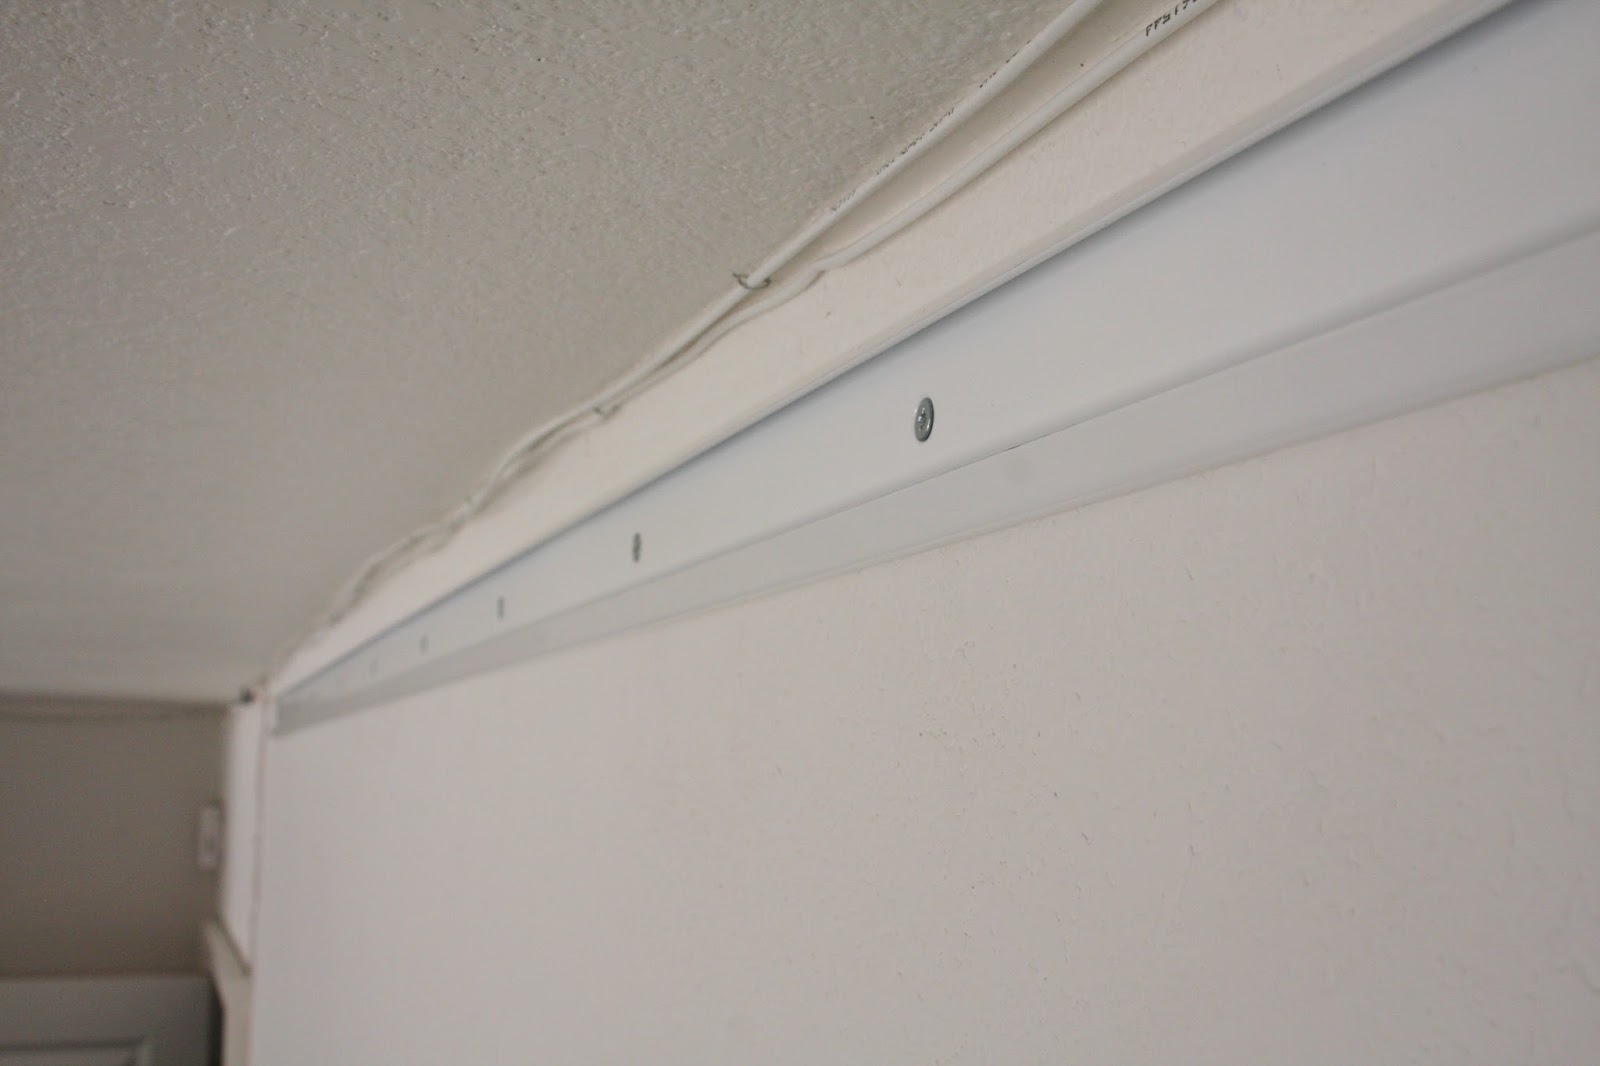
With the top track in place, you’ll now have fun hanging the shelving and accessories. None of this requires tools! I started my top shelf a bit lower than usual because I was adding winter clothing bins that are about 14″ tall…
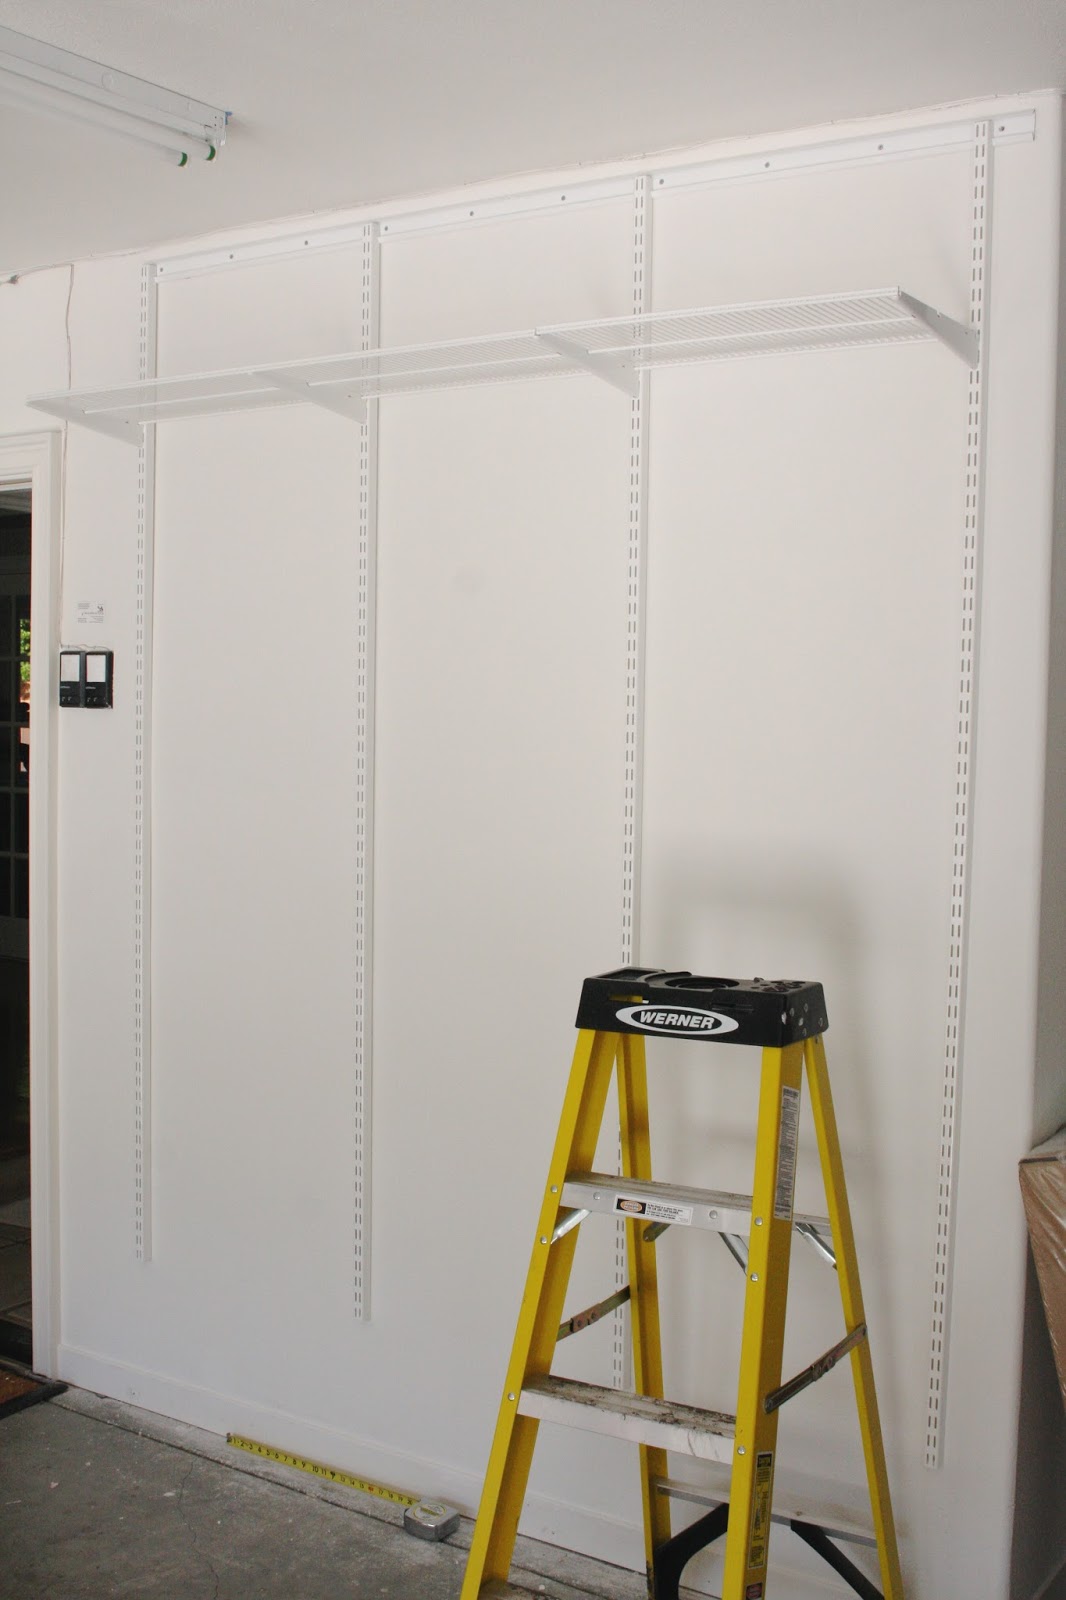
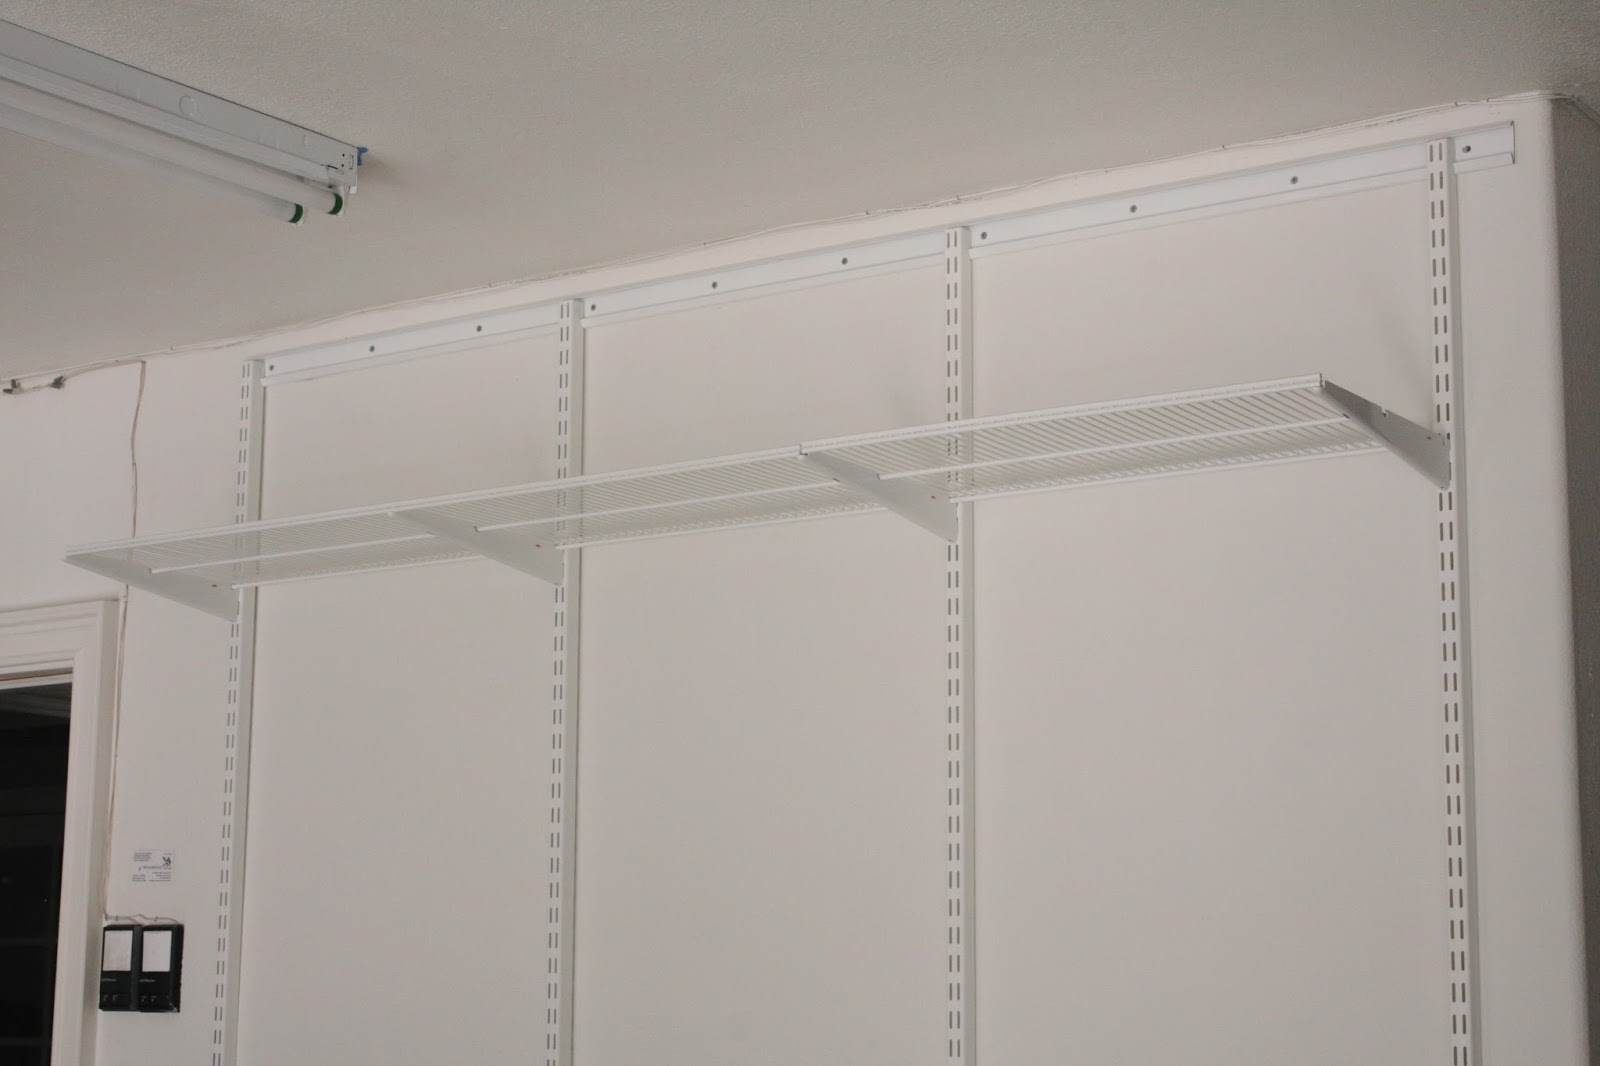
Once that shelf was secured, I added the brackets. It’s a good idea to begin by adding all of the brackets alone. This way you can step back and decide if some shelves need to be closer together or not…

I also added 3 2′ utility tracks, which again required no tools to install…

I then assembled this adorable Martha Stewart cubby / bench system…
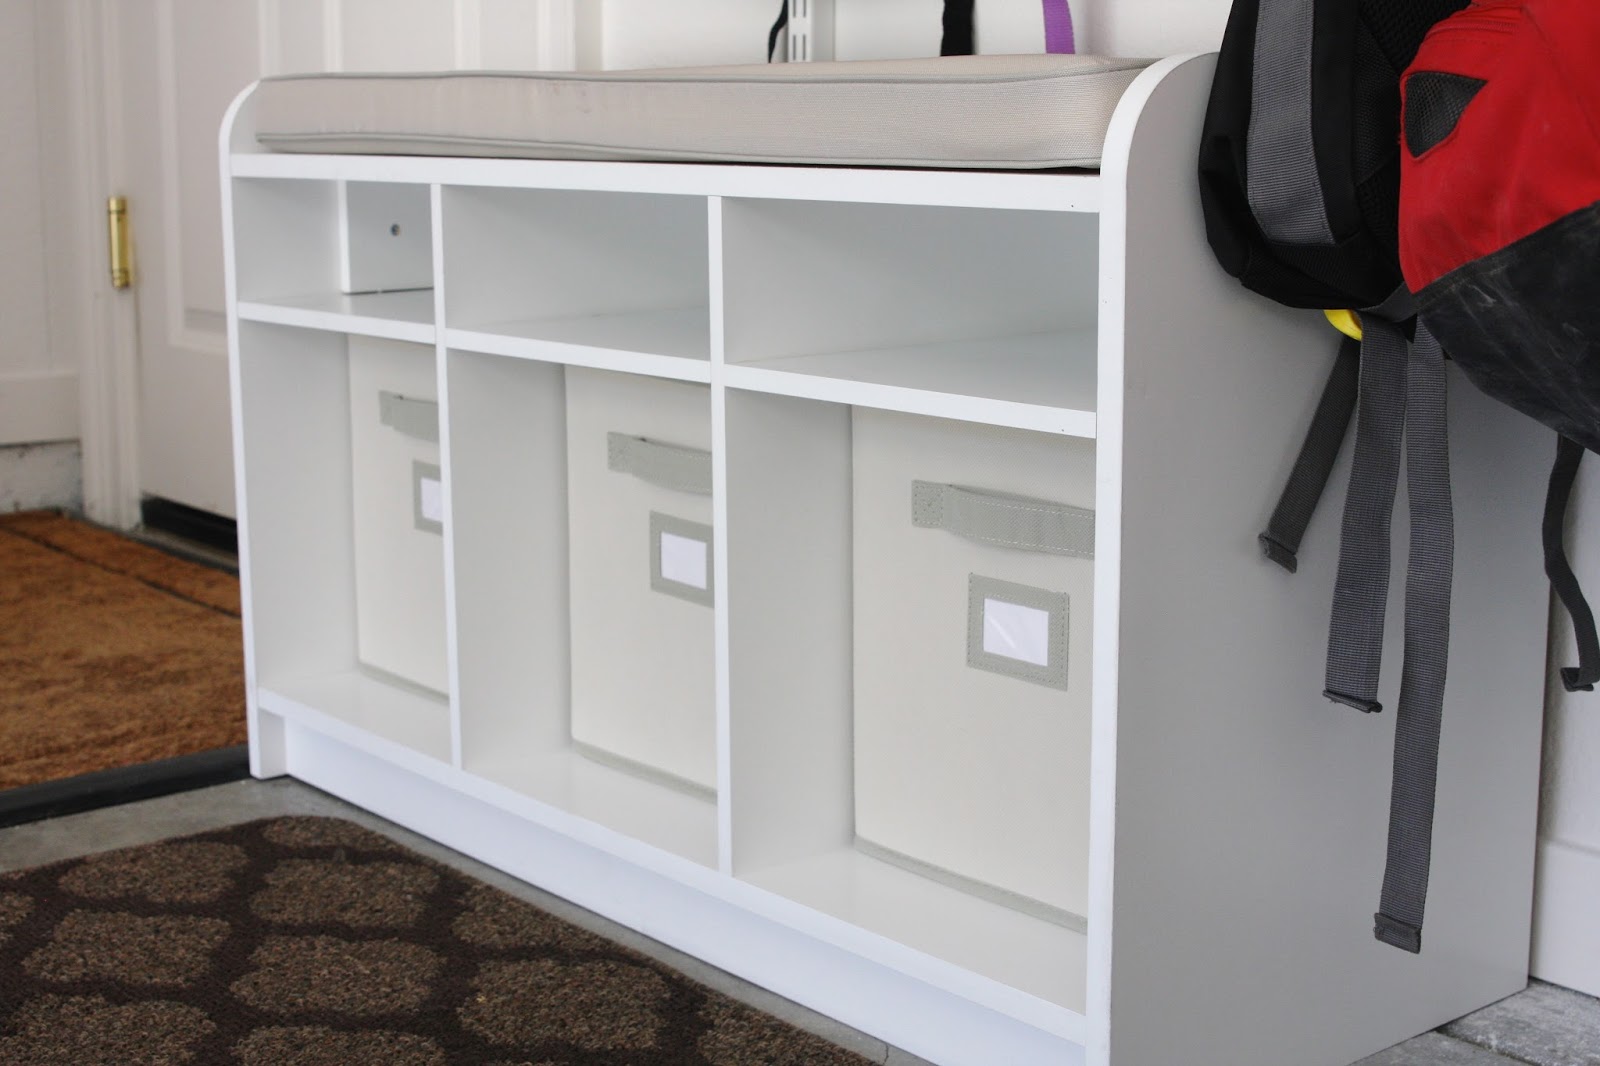
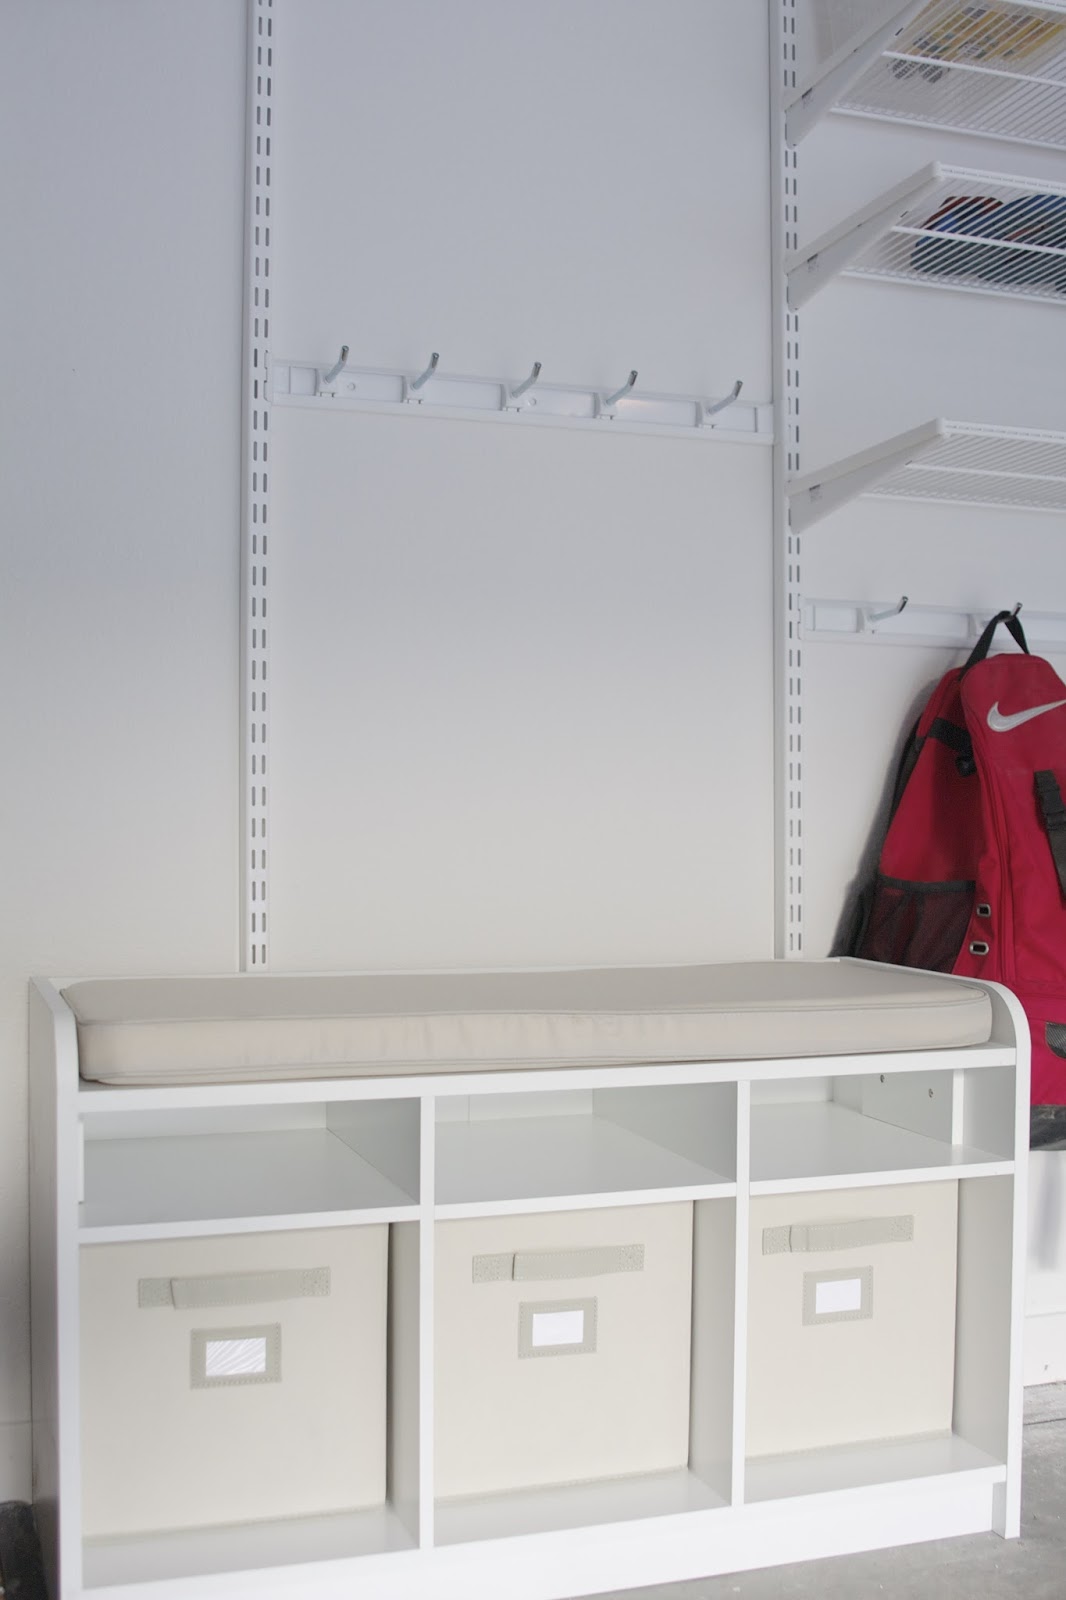
The kids now have a little place to sit and their socks are in the bins below…

I made sure the hooks above the bench would be away from their heads…
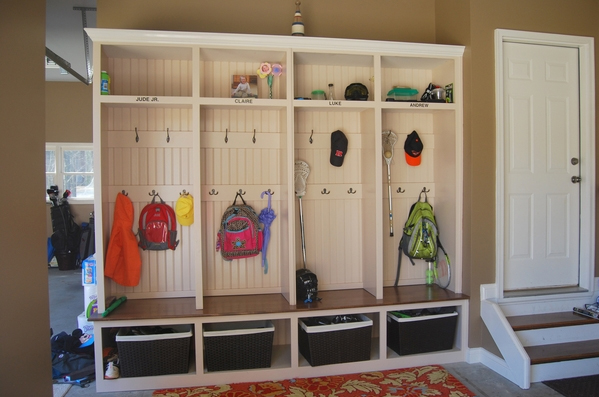
With everything secured, I added our mudroom items to the system. I am so in love with this easy to install mudroom!…
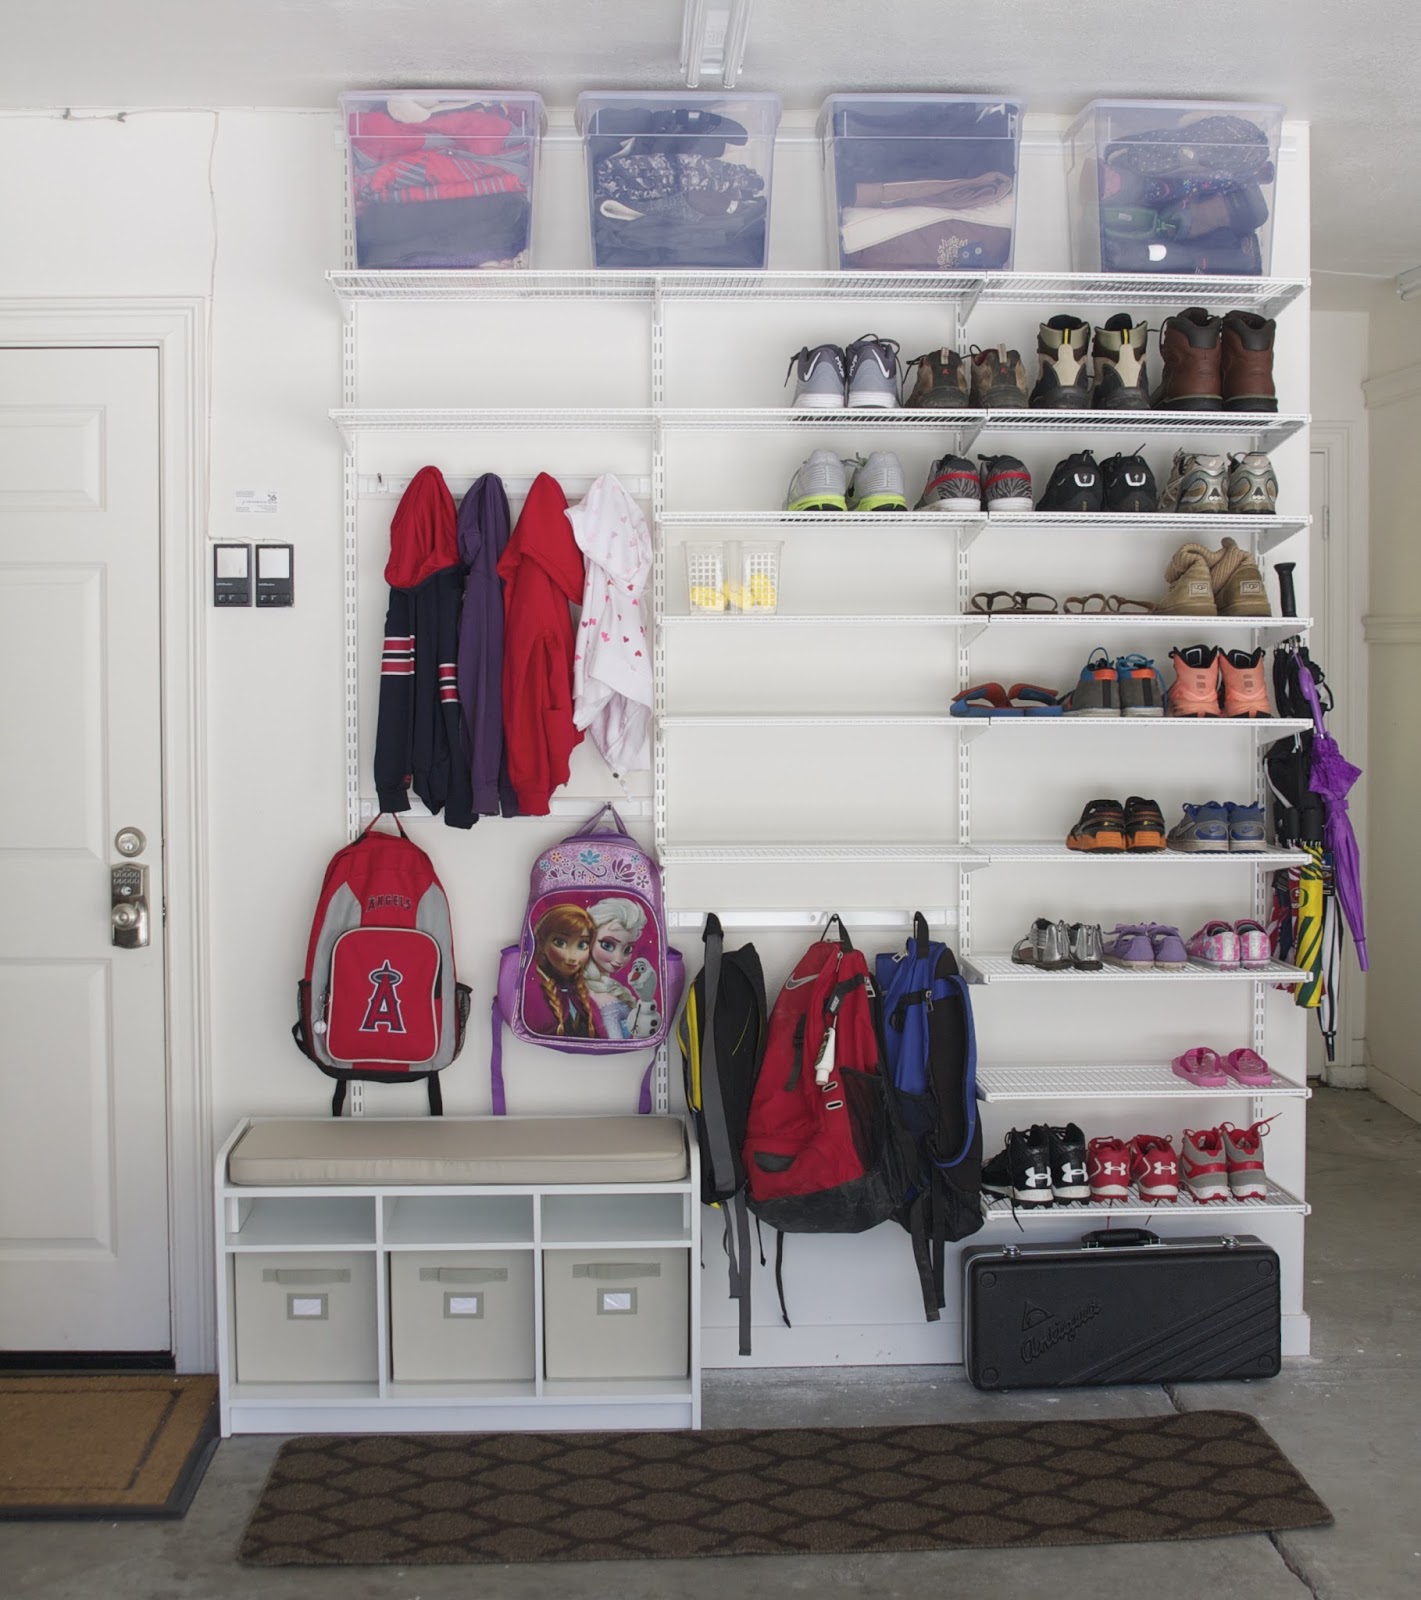
Look at all that space! #hearteyes
Wondering what’s here? It’s our most frequently worn shoes, the kids socks, baseball bags, school backpacks, the kids daily sweaters, umbrellas, all of the kiddos winter gear (for going to the snow or just when it’s cold here in the Bay – beanies, jackets, boots, snow clothes, gloves, scarves), and I even had a spot to tuck away my 10 year old’s sax. He plays in the school band and this cumbersome instrument was taking up too much floor space inside.
We are deep into little league playoff season and these 2 baseball bags plopped on the garage floor were driving me nuts. I love seeing them upright!…
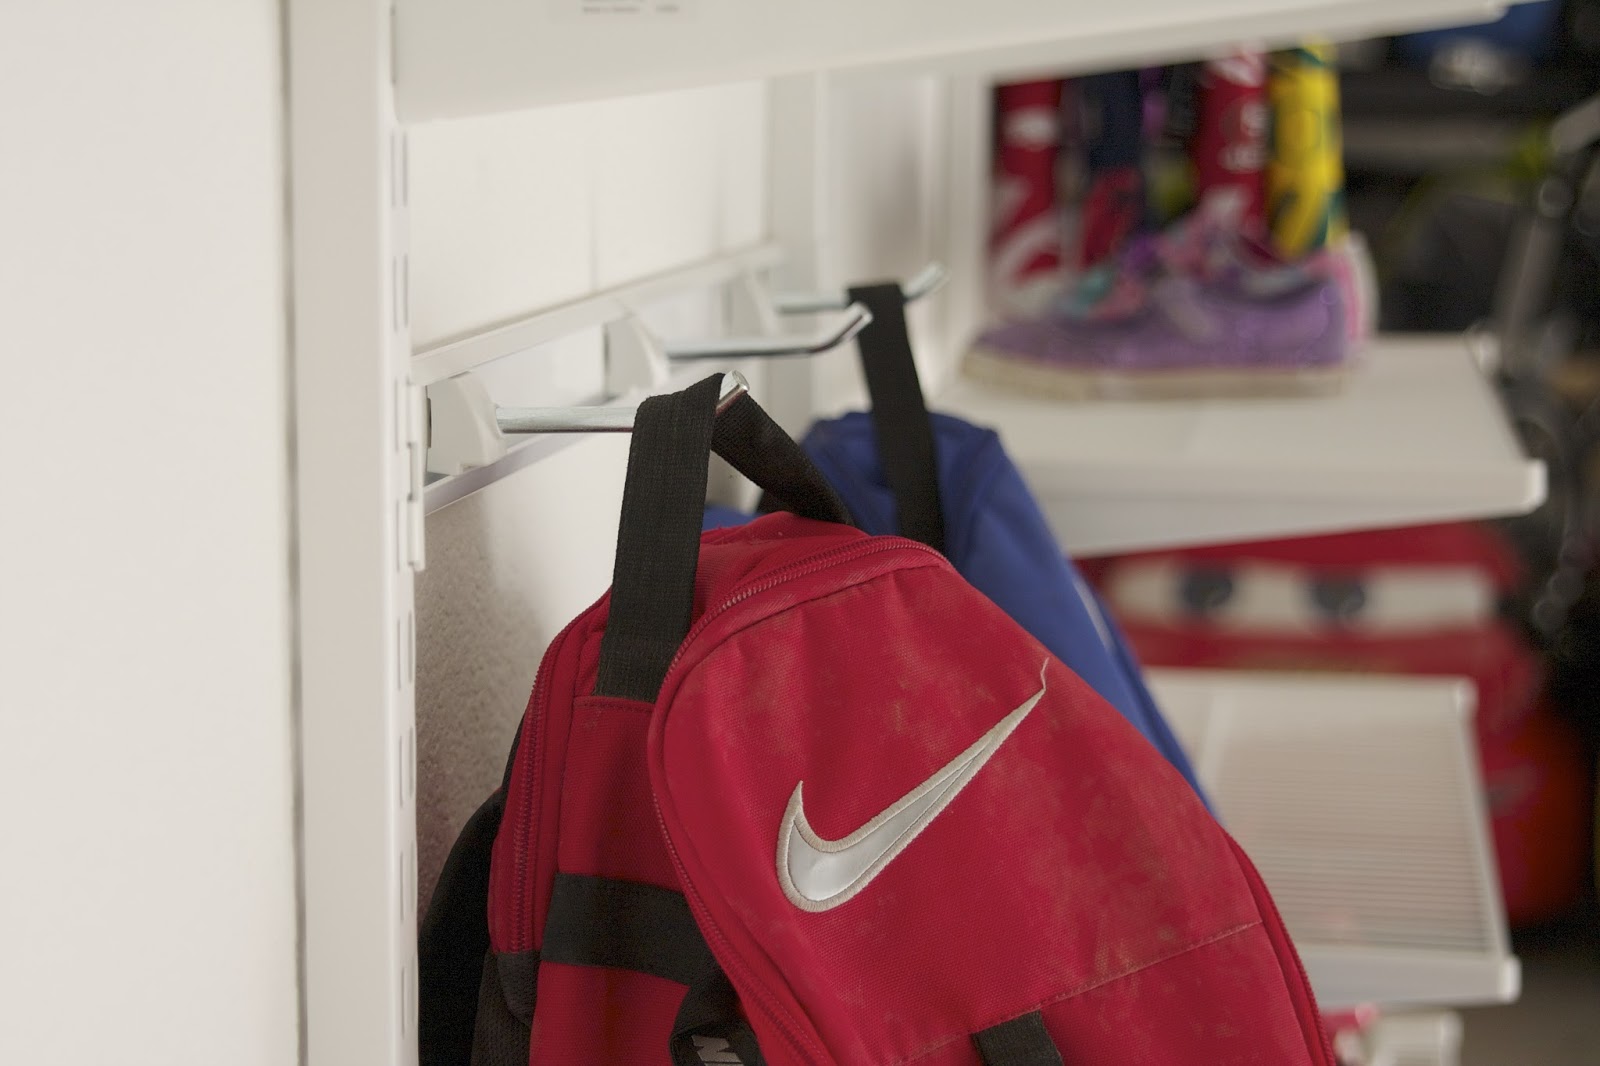
I also added a few side hooks to corral our umbrella inventory…

The utility tracks are incredible! Stay tuned because I’ll be talking more about this product after I finish this wall, which is around the corner from the new mudroom wall…

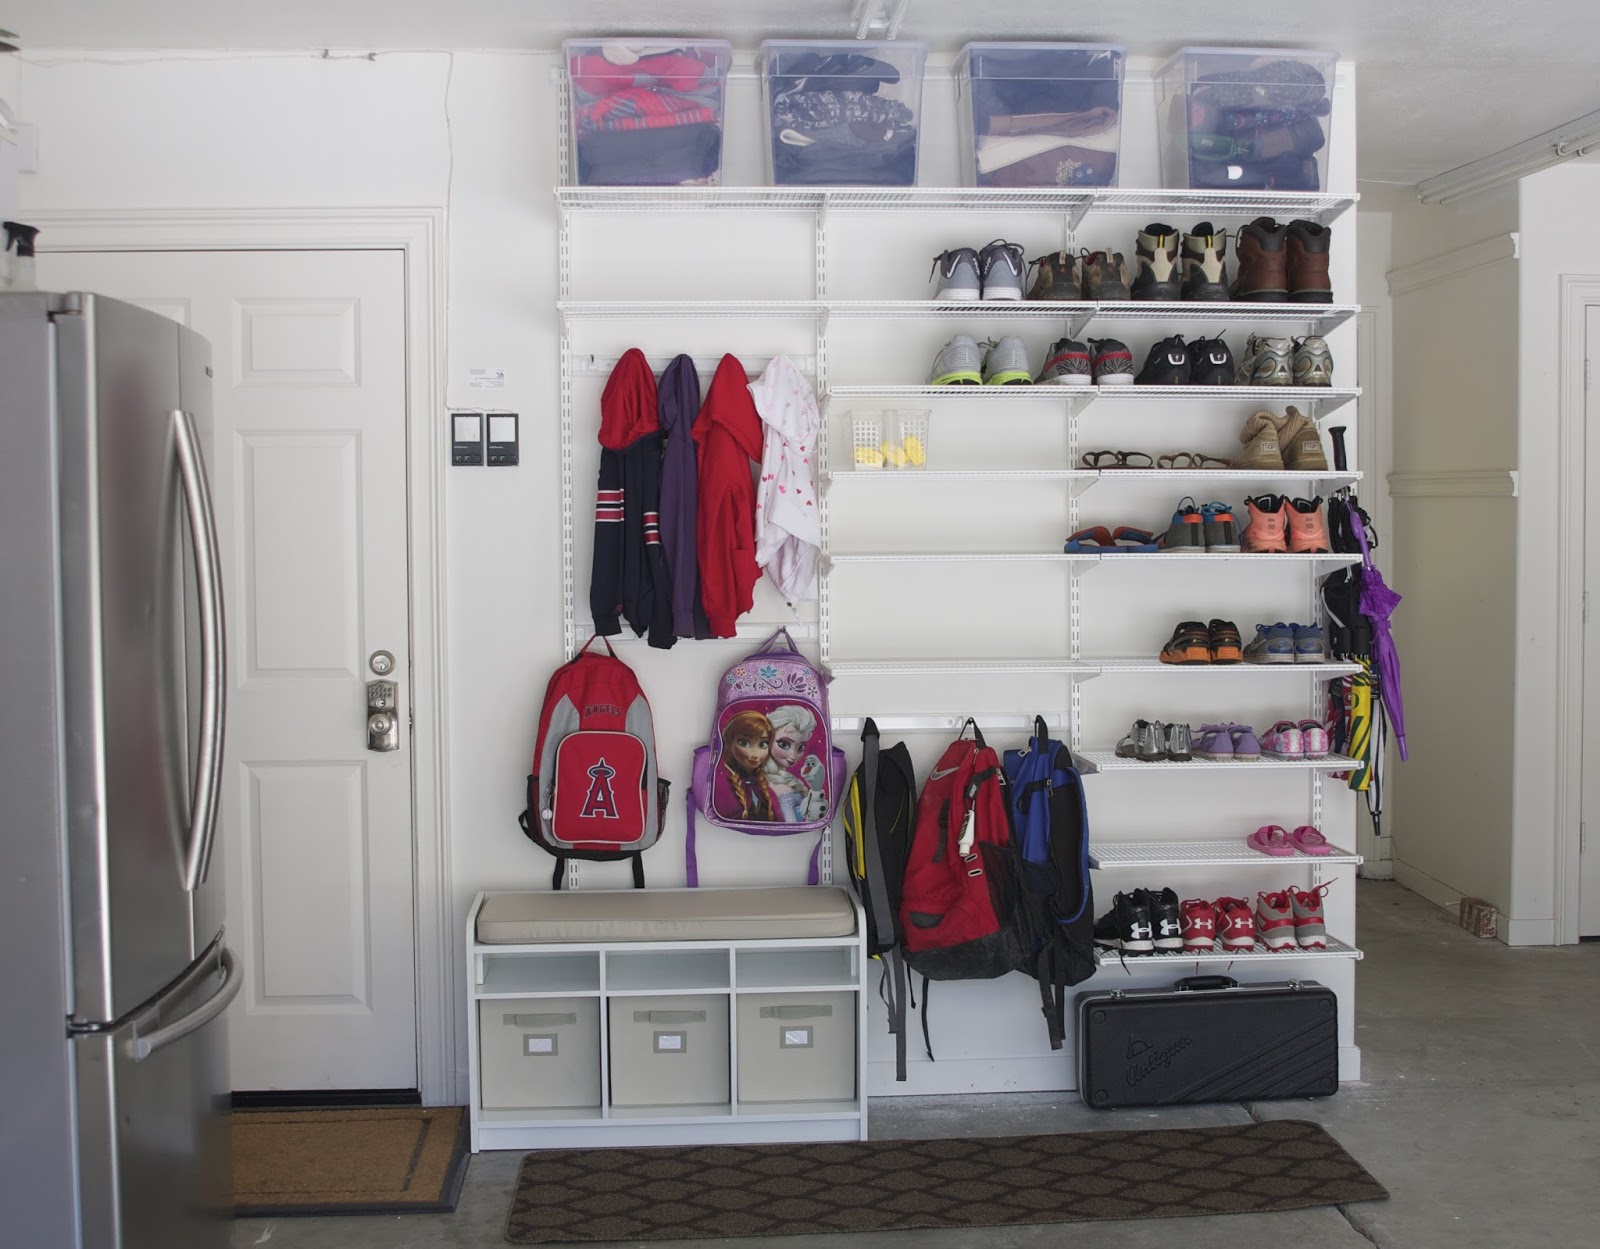
I am in love with my new garage mudroom. I finished it Saturday and our week has been smooth sailing. Love this! If you have a wall in the garage where you could use a mudroom, please consider this idea. It’s not that much money (this was a few hundred bucks) and it will ramp up your efficiency factor for sure. You’ll know where everything is and you’ll free up precious closet space in the kids rooms too!
Before…
After…
Have a great day guys and go organize / DIY something! xoxo
Love it! I have existing shelving in my garage which is super helpful but it's all the same height. It's really hard making the space work for different size bins. One day I'll get some custom shelving put in 🙂
This is so easy, you can do this! But wait until the elfa sale in January! 🙂
xo,
Sam
I absolutely love the simplicity of this! Do the vertical tracks get screwed in to the wall as well?
Thank you! It really is a simple system and so easy to install! No lie!
No, just the top track gets drilled into the wall…everything hangs on that one bar.
xo,
Sam
Samantha – What a great practical and easy-for-beginners system to create order and functionality!! Thanks for the detailed post!
Thank you so much!!!
xo,
Sam
[…] mentioned my garage has been a big issue. I started with one very important wall and am working my way around this 3-car garage…taking one wall at a time. This weekend? I […]
I love love love this! My son has such sweaty feet and his shoes stink! I do not want his shoes in his room, funking up the place. I would love to duplicate this project in my new home! Do you have a problem with spiders and or other creepy crawlers getting in those opened bins to the bottom left? Also, do you feel this will be too big in a 2-car garage? Nothing is currently in it but our cars and a lawn mower.
Awe, thank you! So glad you love it and are considering adding this to your garage. It is a game changer for sure!
To answer your questions – no, never any creepy crawlers. Could have something to do with our climate but have never had an issue there. I also have a pest control company that sprays the perimeter of our home (not indoors) so that helps, I’m sure. I’ve rarely seen spiders or anything in my garage.
No, this wouldn’t be too big in a 2-car garage. The shelves shown here are 12″ depth so it doesn’t stick out too too far. Gives just enough room for shoes to rest on the shelves without overhanging.
Hope that helps!!
Sam
Hi Samantha! Could you tell me where you purchased your cube bins for the cubby bench? Also what model of Elfa shelving did you use? LOVE LOVE your mudroom and your style!
It’s looks terrific ! Well done, and thank you for the inspiration and ideas.
Do you have your shopping list still for the quantity / sizes of Elfa products you used to create your garage mud room? It’s awesome! But I’m a little confused to which exact items and sizes (dimensions) to buy to recreate what you did here. Thanks
I have the perfect wall for this! Do you have a list of items you bought. I do not have a container store near but will drive the 3 hours but want to make sure I get everything I need.
Hi Cindy!
If you send me an email, I can put together a DIY plan for you at my consulting rate. Would need to know the size of the space, etc before pulling together the list.
xx,
Sam
Hi! Where did you get the part that goes across the wall with the backpack hooks? Do you have a link?
Hi,
This is the Elfa Utility Track that connects between the hanging standards. The track has been updated since I completed this wall so it looks a bit different, but it’s the same track.
It’s this track:
https://bit.ly/3Hio9ga
And these hooks that pop into the track:
https://bit.ly/3SsKoFn
Sam